
Adam Horsman
Business Text Messaging | How-To Guide | HubSpot.jpg)
HubSpot text messaging doesn’t need to be hard.
HubSpot is one of the leading CRM systems. Their all-in-one software includes forms, blogging, SEO and extensive sales and marketing tools.
Despite all of these features, one area that’s lacking is the ability to send and receive text messaging in HubSpot. To accomplish that, a HubSpot SMS integration add-on is required.
By adding the integration, you can:
- Send Individual Messages – Send text messages directly from and contact.
- Bulk Text Message – Bulk text message hundreds of contacts, and you track everything on the contacts timeline.
- Automate Text Messaging – Using workflows, you can automatically trigger text messages using HubSpot triggers.
In this blog post we’ll walk you through the basics of getting started, setting up the SMS integration, and starting to send your HubSpot text messages.
Why use HubSpot text messaging?
The short answer is because it works, and your customers want it.
Across every metric text messaging outperforms emails and phone calls.
Text messaging benefits:
- Open rates at 90%+
- Almost instant delivery
- Typically read within 90 seconds
- Read rates 5x higher than email
Two things are needed to get started sending text messages in HubSpot:
1. HubSpot Account
If you don’t already have a HubSpot account, can you get started for free here: HubSpot pricing
2. Sakari SMS Account
Sakari is the text messaging service you’ll link to HubSpot to send and receive the text messages. Get started for free with Sakari by signing up here: https://sakari.io/signup/
Adding the Text Messaging Integration
After you’ve created your HubSpot and Sakari accounts, now you need to link the two system together. This is called an integration.
Setting up your integration between HubSpot and Sakari takes about 60 seconds. We’ve written this HubSpot SMS Quickstart Guide to walk you through the process. No programming is required.
Once you’ve setup the integration, the two systems will be linked. Now you can send and receive SMS in your HubSpot account.
Options for Sending Texts in HubSpot
Once you’ve setup your HubSpot text messaging integration, now you’re ready to start sending messages.
Within HubSpot, you have two options for texting: manual messaging or texting with HubSpot workflows.
So what’s the difference and which one is better?
Generally, the right answer is to use both. Automating text messages in workflows when new contacts are added, forms are completed, or a customer registers for an event. Manual messaging is great for a more personal touch. You can have two-way text conversations with a contact using manual messages.
We’ll take a look at each here.
Manually Sending Texts in HubSpot
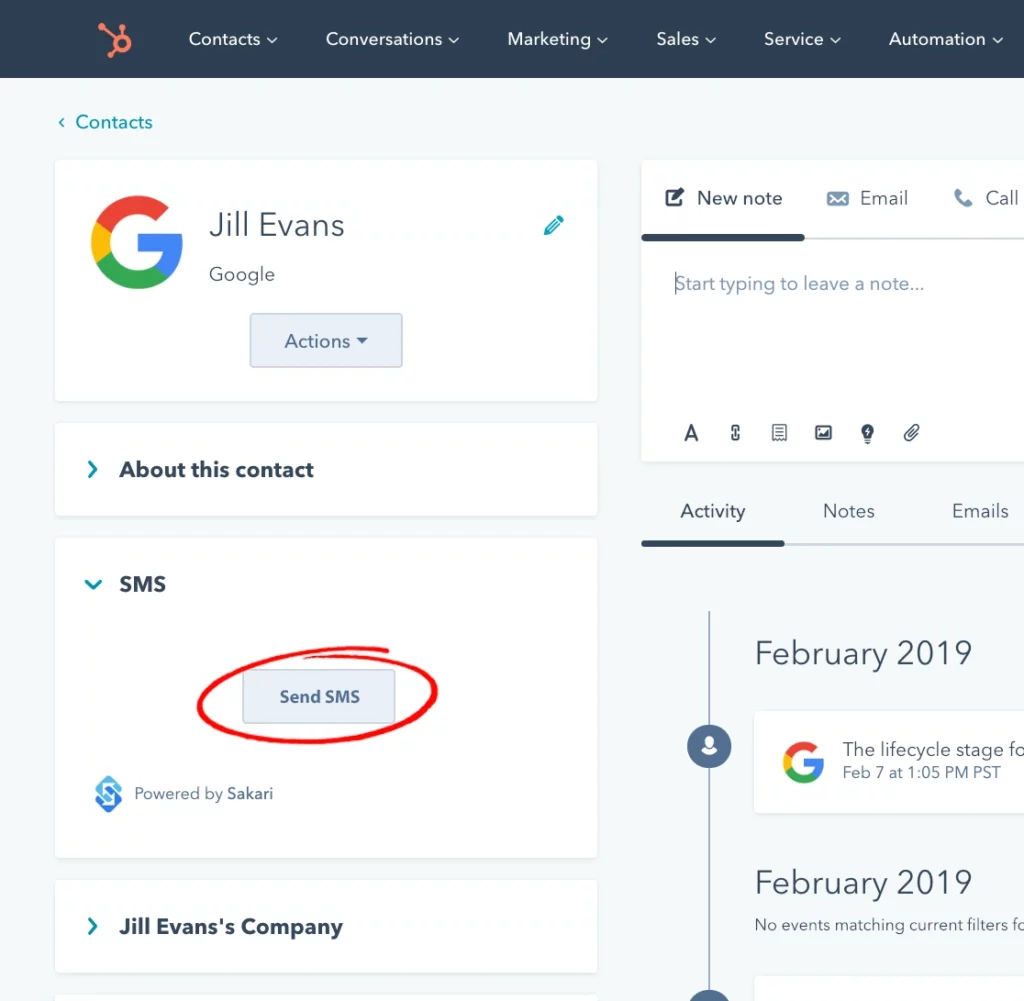
On each contact contact record a new text message module is added (see the image below). When you click the “Send SMS” button a texting popup window appears. Simply type your message and click send. Your text message will be sent out in seconds, directly to your HubSpot contact.
Pros
- Easy. Send a message in seconds.
- Each message completely customized
Cons
- Manual
Using HubSpot Workflows to Send Texts
Workflows are an automated process where actions are triggered based on events.
When creating a workflow, each workflow will have an associated trigger (e.g. form completions, new signups, etc.) and an event. The event is the action you want to occur, in our example, it will be sending a text message.
The benefit of workflows is two-fold: a reduction in errors made and increased scalability.
Because you’re not manually typing messages out, you will minimize errors by setting your workflow up just once. You also won’t continue to re-invent the wheel, once you have set up the workflow, it will continue to run 24 hours a day, 7 days as week, allowing you to greatly scale your team.
Pros
- Scalable
- Fast
- Automated
Cons
- Harder to setup
Sending a text messaging in HubSpot manually is as simple as clicking a button.
Step 1 - Open a contact record
Select any contact record in HubSpot. The contact must have either a “Phone number” or “Mobile phone number” field populated.
When setting up your Sakari account, you can select which of these two fields you use to record mobile phone numbers.
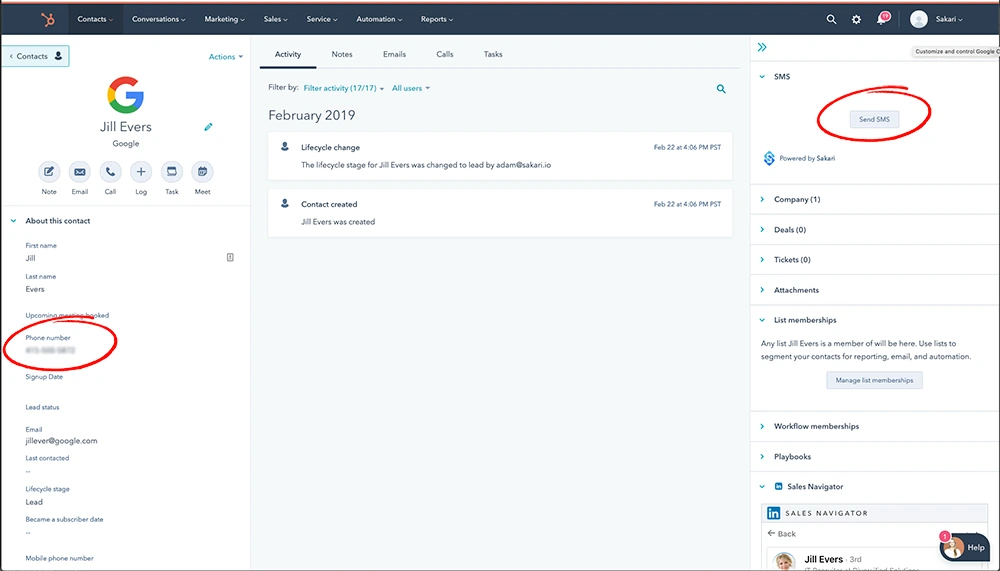
Pro Tip
HubSpot has two phone number fields by default. During the Sakari integration setup you have your choice of either mapping the "Phone number" or "Mobile phone number."
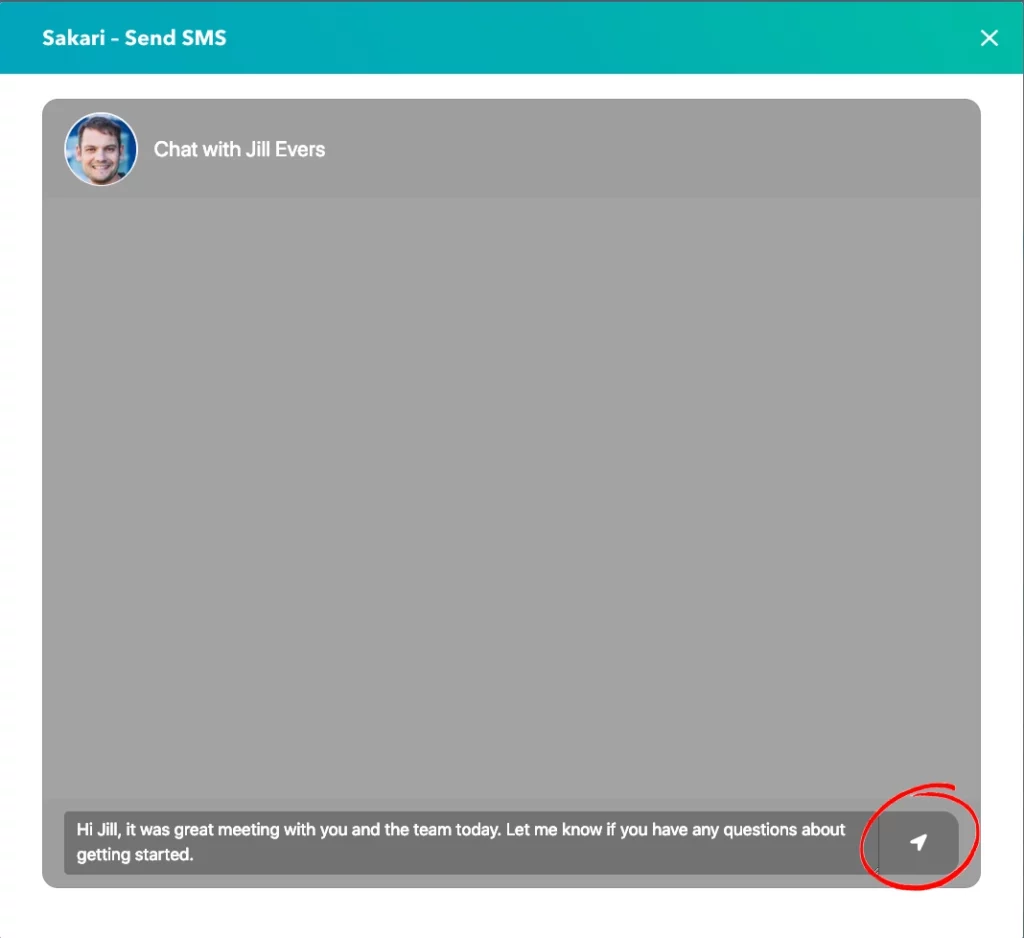
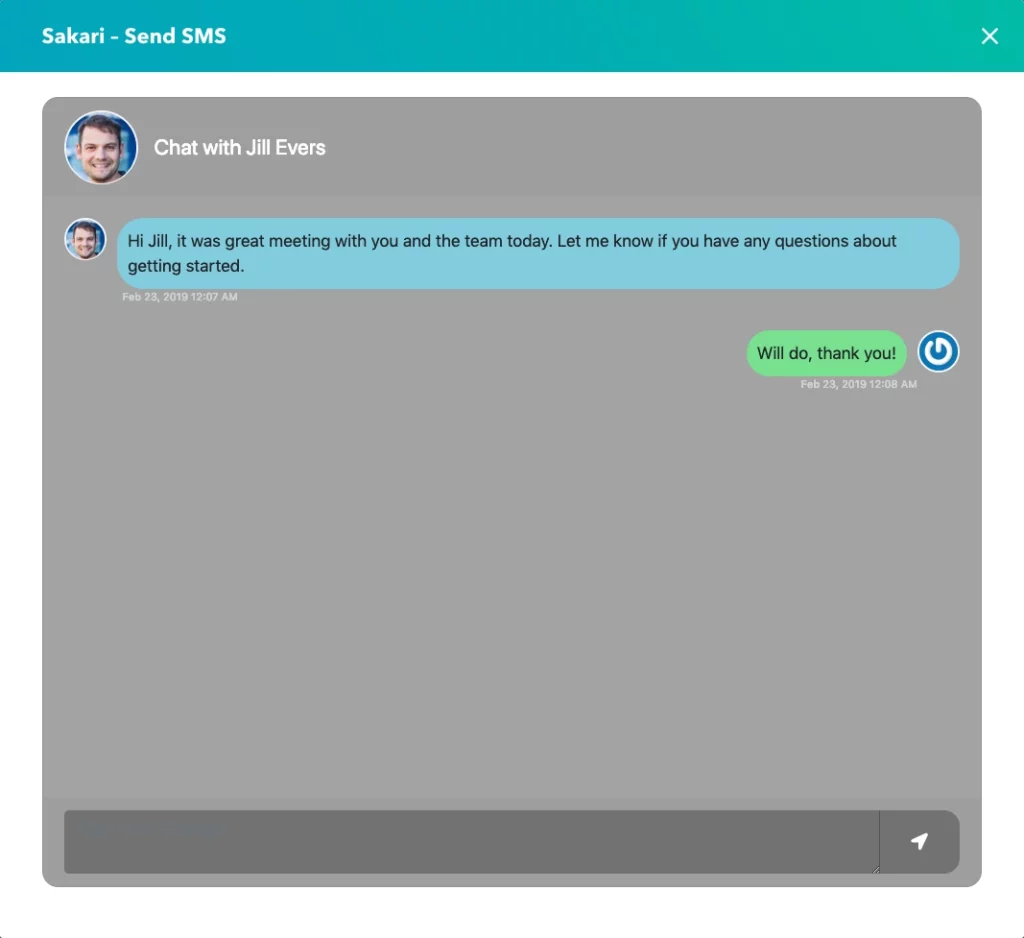
Step 2 - Type your message
Click the “Send SMS” button.
A chat interface will appear. Type your message and click the “Send” icon. Your text message will be sent in seconds.
Step 3 - Two-way text conversation
You can have HubSpot two-way text messaging conversations.
When your contact responds it will be visible on the contacts timeline and in the Sakari SMS chat interface.
HubSpot Chat Interface
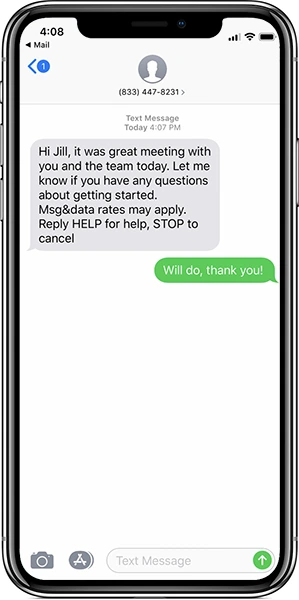
Customer Experience
The message as viewed from the contacts mobile phone.
Note that the “opt-out” language is automatically added on the first message sent to any contact. Subsequent messages will not include this.
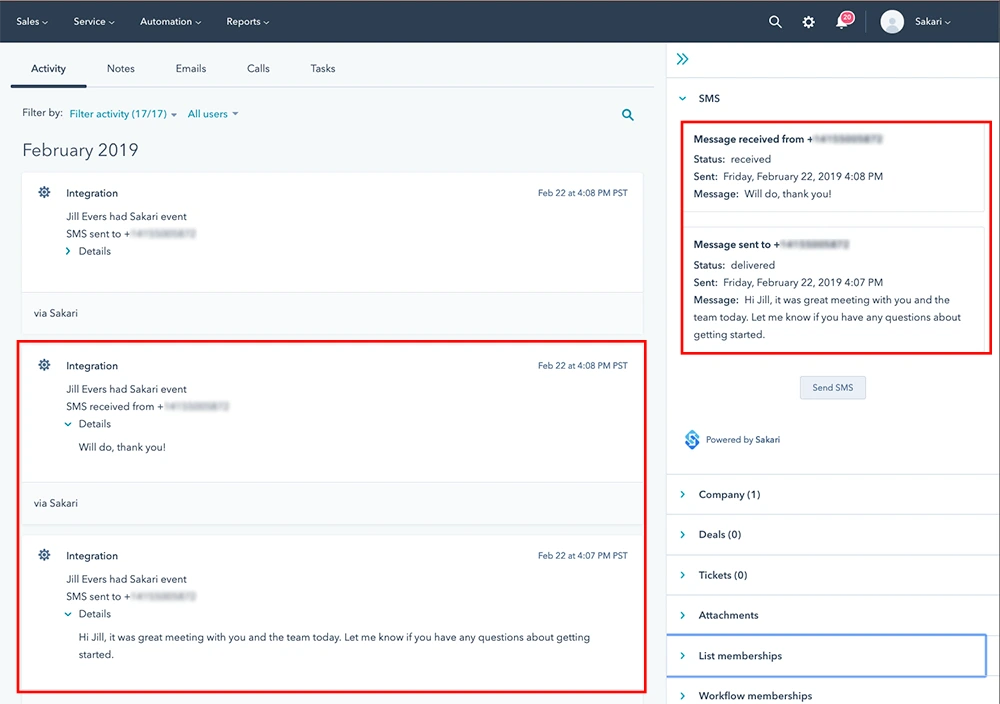
Step 4 - Track everything
All sent and received text messages are tracked in the contacts HubSpot's timeline.
The last three messages are displayed in the “SMS” module (displayed top right). All text messages are displayed in the timeline, so they can be tracked over time.
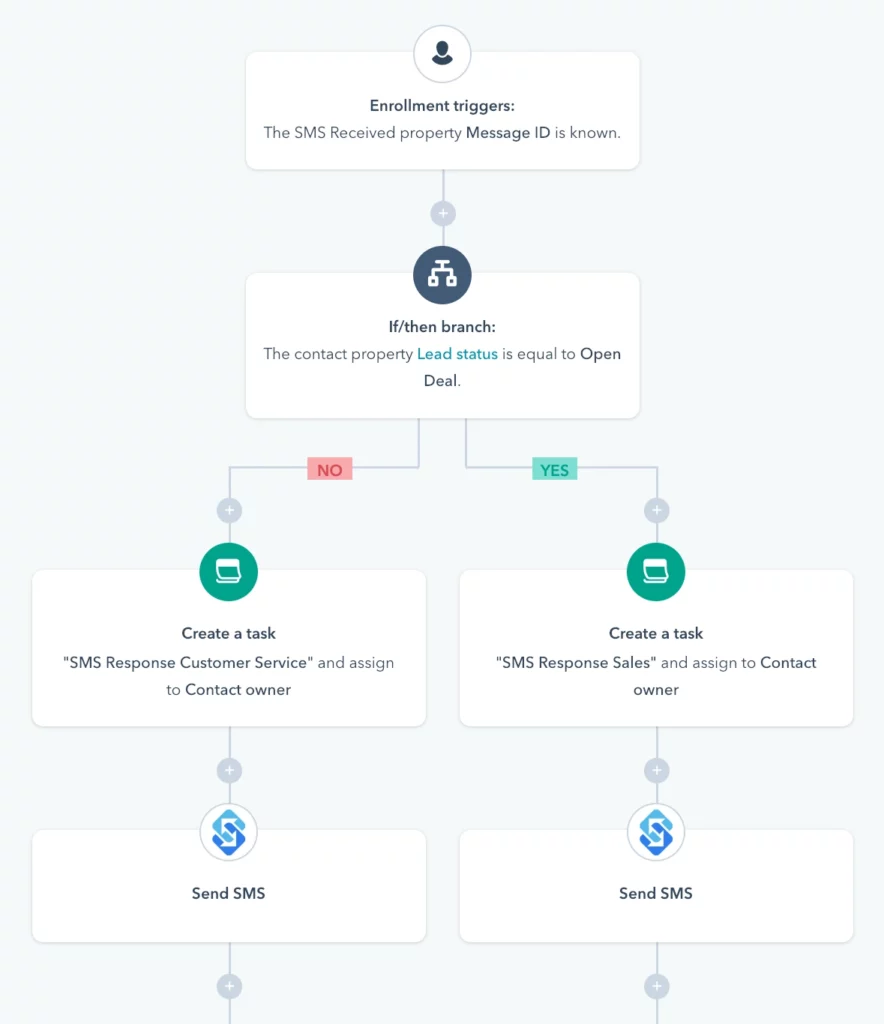
You can automate your text messaging using HubSpot workflows.
Workflows allow you to setup “trigger” events that will automatically cause events to occur (like sending a text message).
There are almost limitless possibilities on what can be done with workflows. We’ll walk through a basic example here, to help you understand the structure.
Step 1 - Creating a new HubSpot workflow
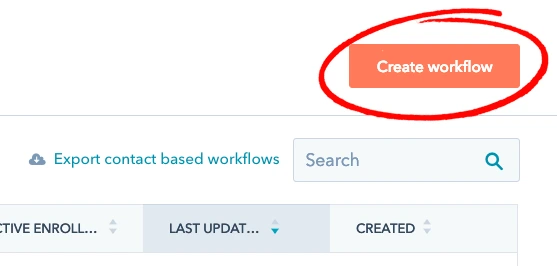
In the top navigation select Automation > Workflows
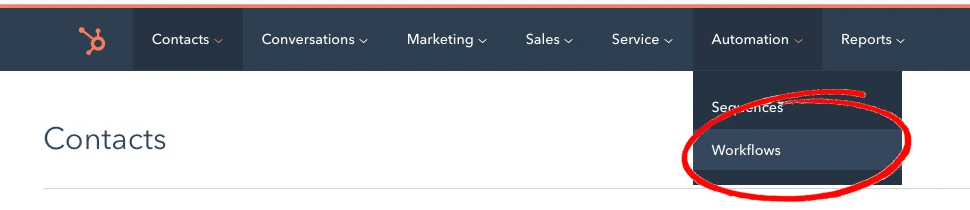
Click the “ Create Workflow ” button.
Step 2 - Select your trigger
Workflows are initiated based on a “trigger” event. When the trigger event occurs (e.g. a form is filled out), then the workflow will begin.
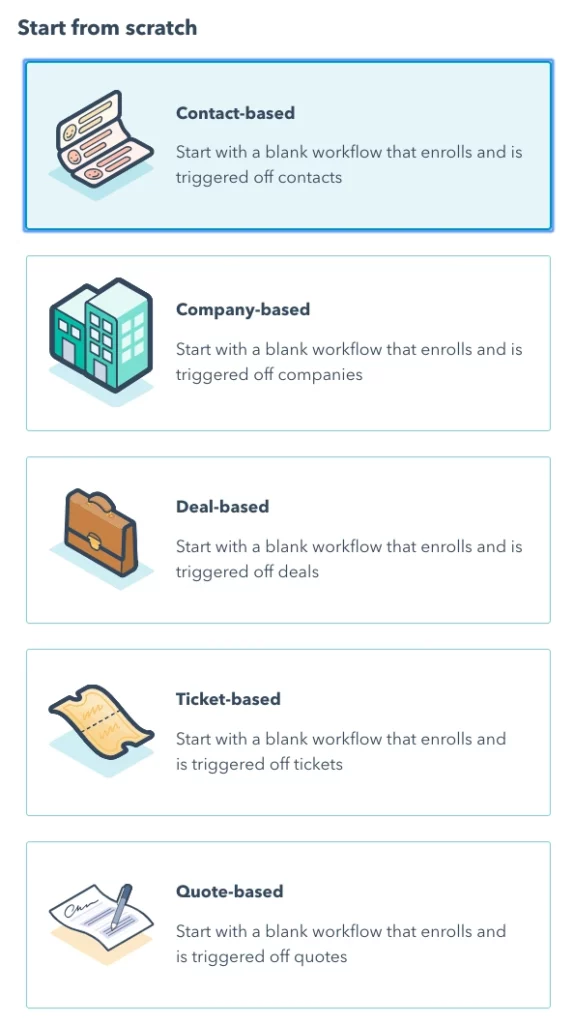
The trigger can be based on one of five areas:
- Contact-Based
- Company-Based
- Deal-Based
- Ticket-Based
- Quote-Based
In our example, we’ll select “Contact-Based” and click the orange “Create Workflow” button in the top right.
Step 3 - Setup your trigger
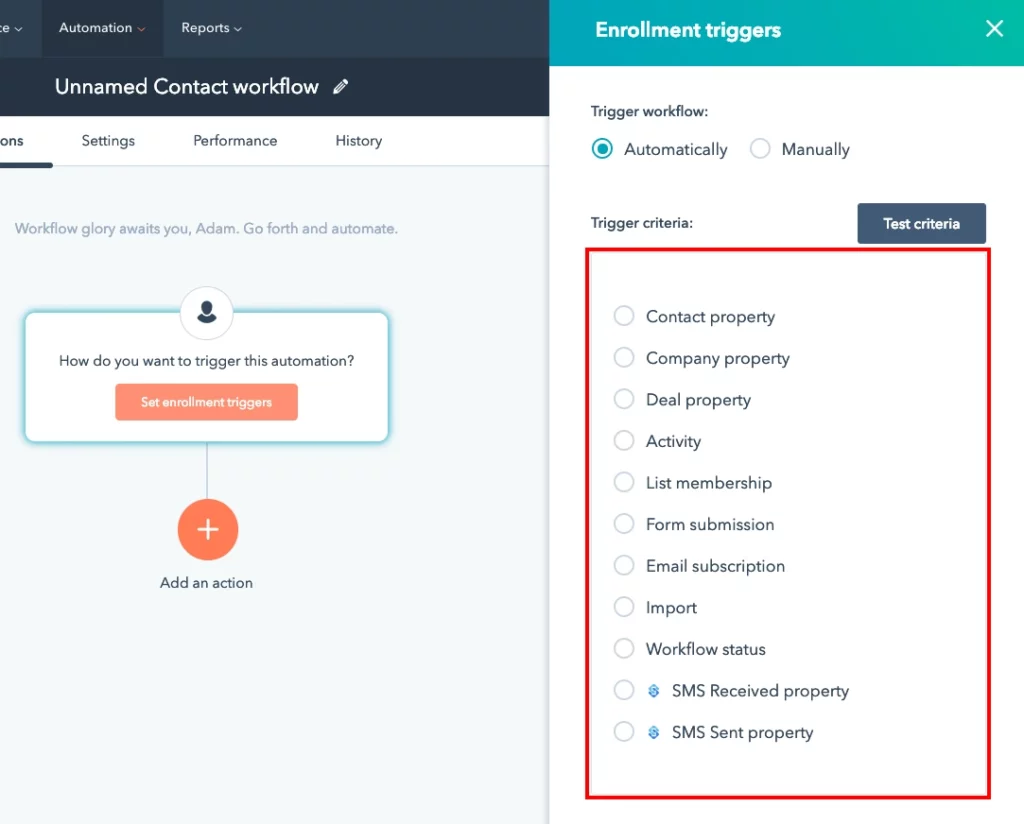
Now that we’ve selected our HubSpot trigger type (contact-based), we now need to select the trigger criteria.
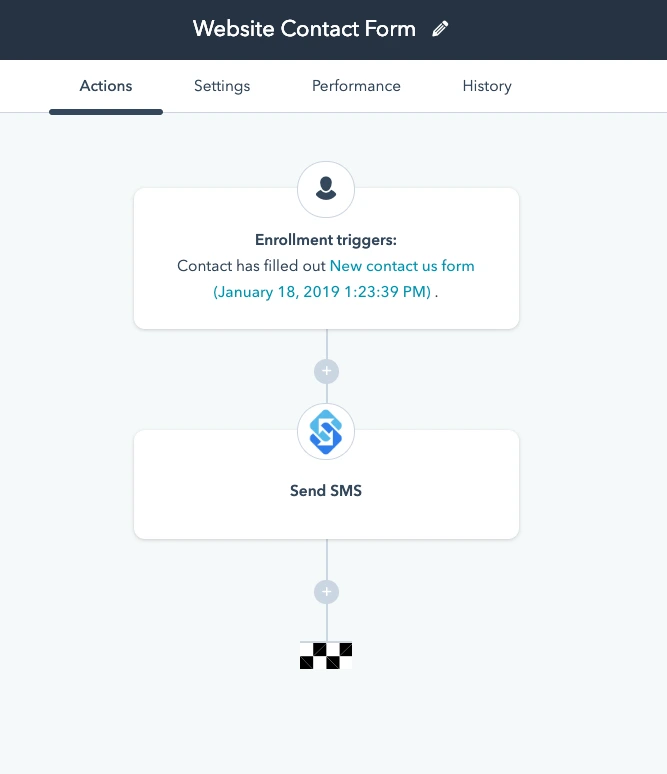
In our example, we’re going to using the trigger of a form submission. We’ve created a HubSpot contact form previously and added it to our website. Using this a workflow, when the form is completed, a personalized text message will be sent to the contact.
HubSpot trigger criteria options:
- Contact Property
- Company Property
- Deal Property
- Activity
- List Membership
- Form Submission
- Email Subscription
- Import
- Workflow Status
- SMS Received Property
- SMS Sent Property
For our example, we will select the “Form Submission” option.
Step 4 - Link your form
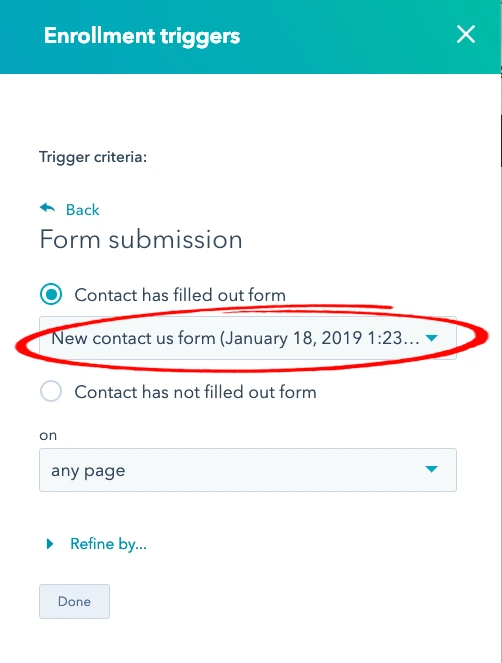
Now we’re ready to add our form.
We’re going to select our HubSpot “Contact Us” form created earlier under the pulldown of “Contact has filled out form” option. Whenever someone completes this form, it will trigger the workflow to execute.
Click “Done.”
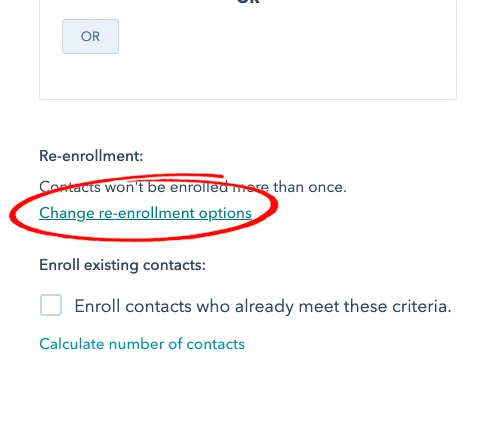
Step 5 - Setup re-enrollment
By default, your contacts won’t be able to re-enroll in your workflows. This means if they fill out a contact form twice, only the first time they’ll receive a text message reply. For our example, that’s not desirable.
To enable contact re-enrollment we’ll click the “Change re-enrollment options” link. Now we will check both available options (see image). This will all a contact to repeatedly be added to this workflow, when they fill out the form again.

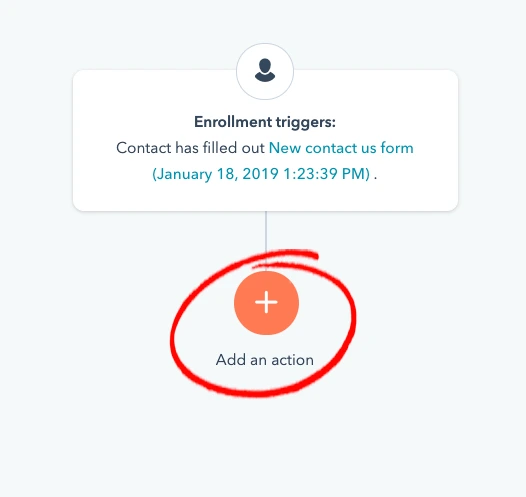
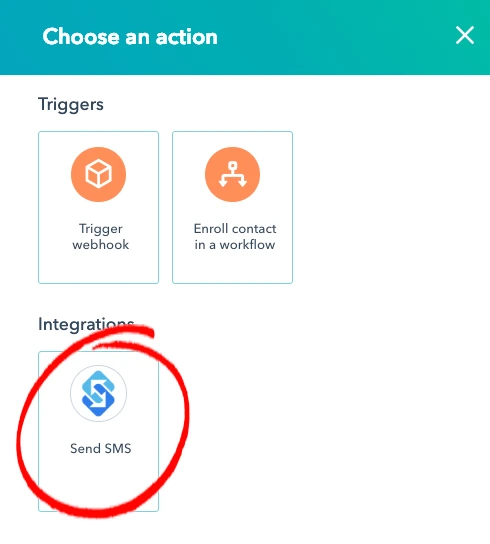
Step 6 - Add the text messaging action
Click the orange “+” Add an action button. Select the “Send SMS” Sakari integration action.
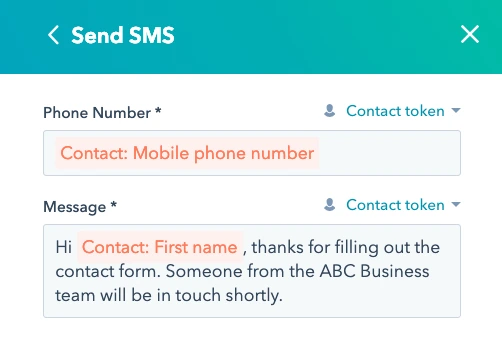
Step 7 - Draft your text message
Now we’ll create our HubSpot text message.
First, we’ll select the phone number that the message should be sent to. This should align with what fields are populated in your form and how you store your data. In our case, our form has the “Mobile phone number” field, so we’ll use this field from the contacts record.
Second, we’ll type our message in the “Message” field.
Pro Tip
Step 8 - Review your workflow
Give your workflow a name (if you haven’t already) and review the steps.
Add any additional events or delays by clicking the “+” sign along the workflow timeline.
Step 9 - Set it live!
The final step to have your HubSpot text messaging workflow working is to turn it on. Click “Review” in the top right, then “Turn On” and you’re all set. Your workflow is live.
Review the workflow

Turn it on

Review the workflow

Try Sakari's SMS Marketing Platform for FREE
Ready to transform the way you communicate with your customers? Start your 14-day free trial with Sakari today and experience the power of seamless SMS messaging at your fingertips.
No credit card required, just immediate access to all the tools you need to enhance engagement and drive results.
You might also like


Award-winning performance