
Adam Horsman
How-To Guide | HubSpot | Hubspot SMS | Contact Owner
How can you personalize HubSpot SMS messages to make them a little more friendly and less of a marketing message? HubSpot uses the Contact owner property to set the ownership of a contact, but unfortunately, the only contact owner attribute that can be defined in HubSpot is the contact owners name.
In this article we’ll walk through how to create personalized HubSpot text messages that allow you to add ANY contact owner attributes you want to your sales message. Using just a single template, we can automatically insert a salesperson phone number, name, title – whatever!
HubSpot Contact Owner Workflow Personalization
In order to send HubSpot text messages using Contact owner attributes, you’re going to need to have three things prior to get started:
-
A HubSpot account. HubSpot is a Customer Relationship Management (CRM) tool that allows you to easily manage thousand of customers. To get started for free, go to: https://www.hubspot.com/
-
Sakari SMS. By default, HubSpot does not have external SMS capabilities. In order to send HubSpot deal text messages, we need to add a third-party SMS service. We will link the two systems using HubSpot integration.
-
Sakari SMS <> HubSpot integration. Linking HubSpot and Sakari is a simple process that takes just minutes and requires no code. Here’s the guide to setting up HubSpot text messaging integration.
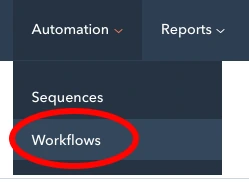
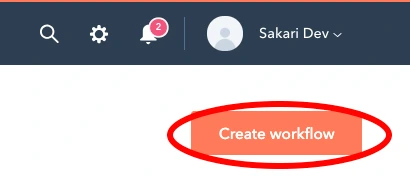
Step 1: Create a new workflow
Step 2: Select Contact-Based Workflow

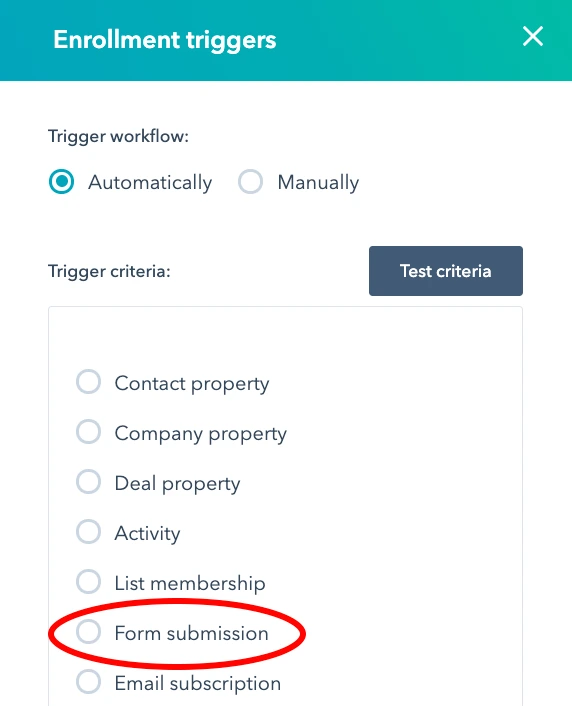
Step 3: Set Enrollment Triggers
Click the orange “Set enrollment triggers” button to add a trigger.

Now we’ll define the HubSpot workflow trigger. The trigger is what will cause the workflow to begin. In our example, we want a text message to be sent to a customer when a form is submitted. Alternatively, we could select any of the other options as a trigger.
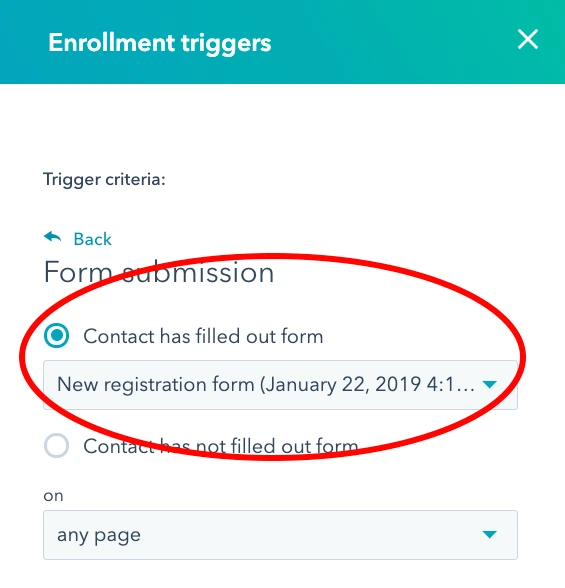
Select the form you want to trigger the text message. Then click “Done” and click “Save.”
Step 4: Add an action
Now that we’ve completed the enrollment trigger, we’re ready to add the action. The action is what happens when the enrollment criteria has been met. Click the orange “Add an action” button.
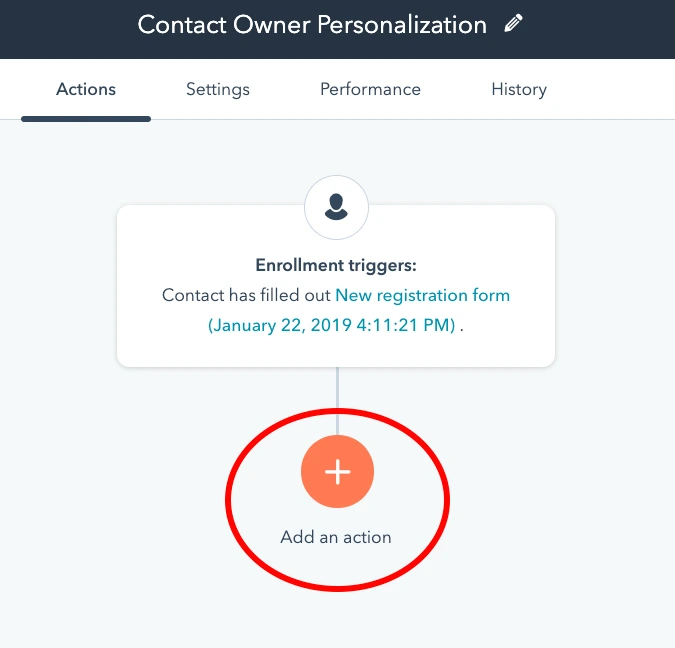
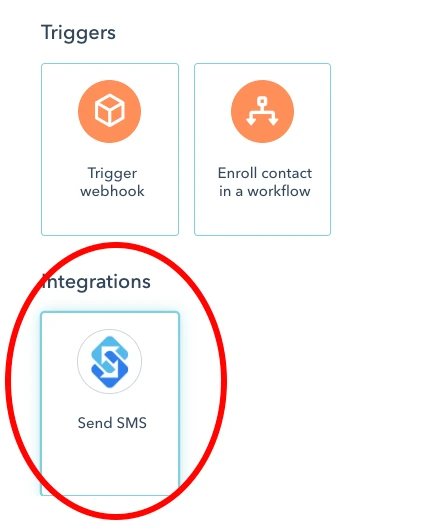
Select the “Send SMS” integration option.
Step 5: Configure your SMS message
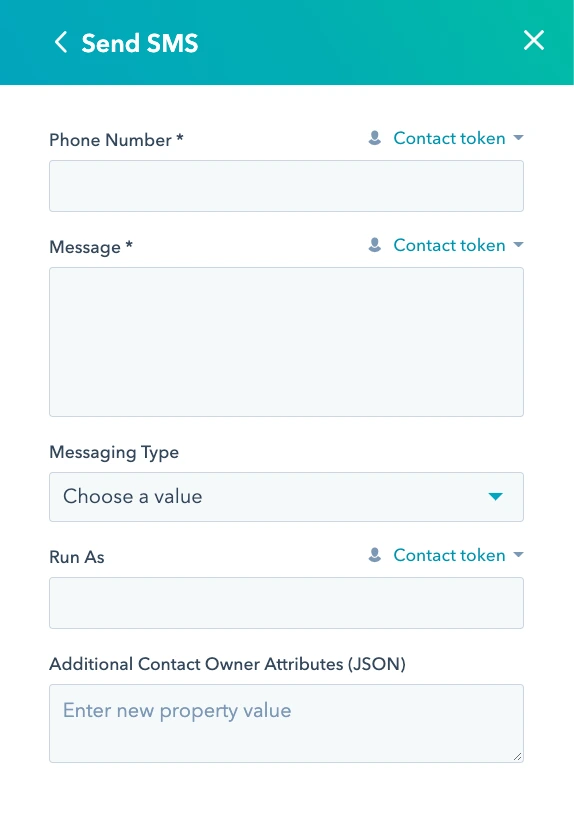
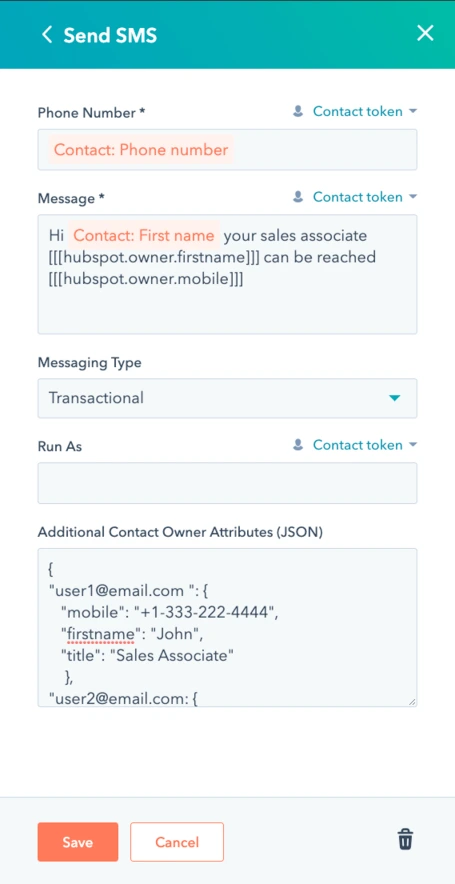
After selecting the “Send SMS” integration option, a new window will appear to configure your text message. There are five fields that need to be set in order to configure your message.
Send SMS Fields
- Phone Number – this is the phone number of the contact that will receive the text message
- Message – this is the message that the contact will receive
- Messaging Type – transactional or marketing
- Run As – This will send the text message from a specific contact owners dedicated phone number
- Additional Contact Owner Attributes (JSON) – the JSON data that will be used to automatically personalize each text message
Phone Number
- Phone Number (a HubSpot default field)
- Mobile Phone Number (a HubSpot default field)
- HubSpot custom property
Message
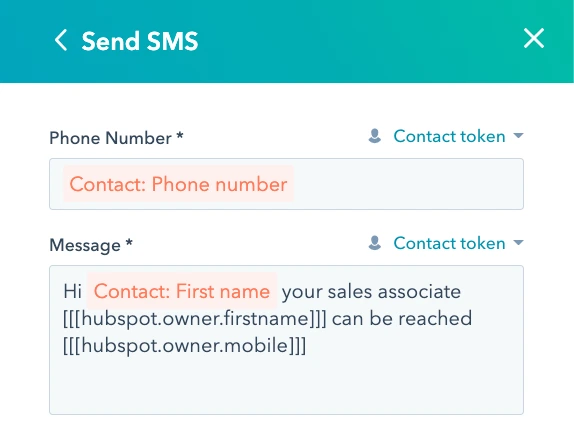
Messaging Type
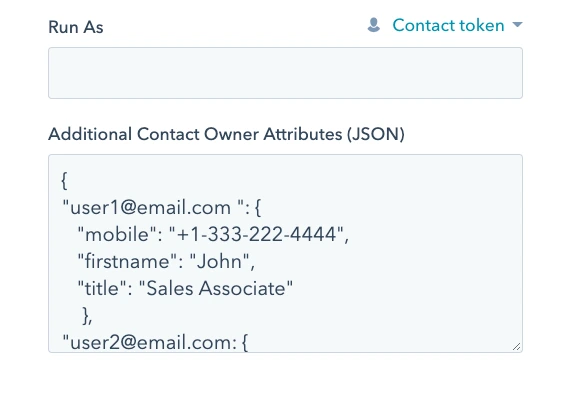
Run As

Additional Contact Owner Attributes (JSON)
JSON Example
{

   “user1@email.com”  :{

   “mobile”  :”+1-333-222-4444″,

   “firstname”  :”John”,

   “title”  :”Sales Associate”

  },

   “user2@email.com”:  {

   “mobile”  :”+1-333-444-5555″,

   “firstname”  :”Mary”,

   “title”  :”General Manager”

  }

}
Step 6: Save your SMS Message
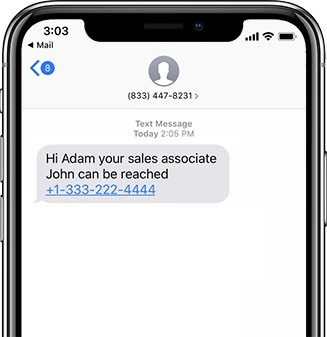
Step 7: Testing the Contact Owner Messaging
Contact Owner of John
Contact Owner of Mary

Ready to transform the way you communicate with your customers? Start your free trial with Sakari today and experience the power of seamless SMS messaging at your fingertips.
No credit card required, just immediate access to all the tools you need to enhance engagement and drive results.
You might also like


Award-winning performance